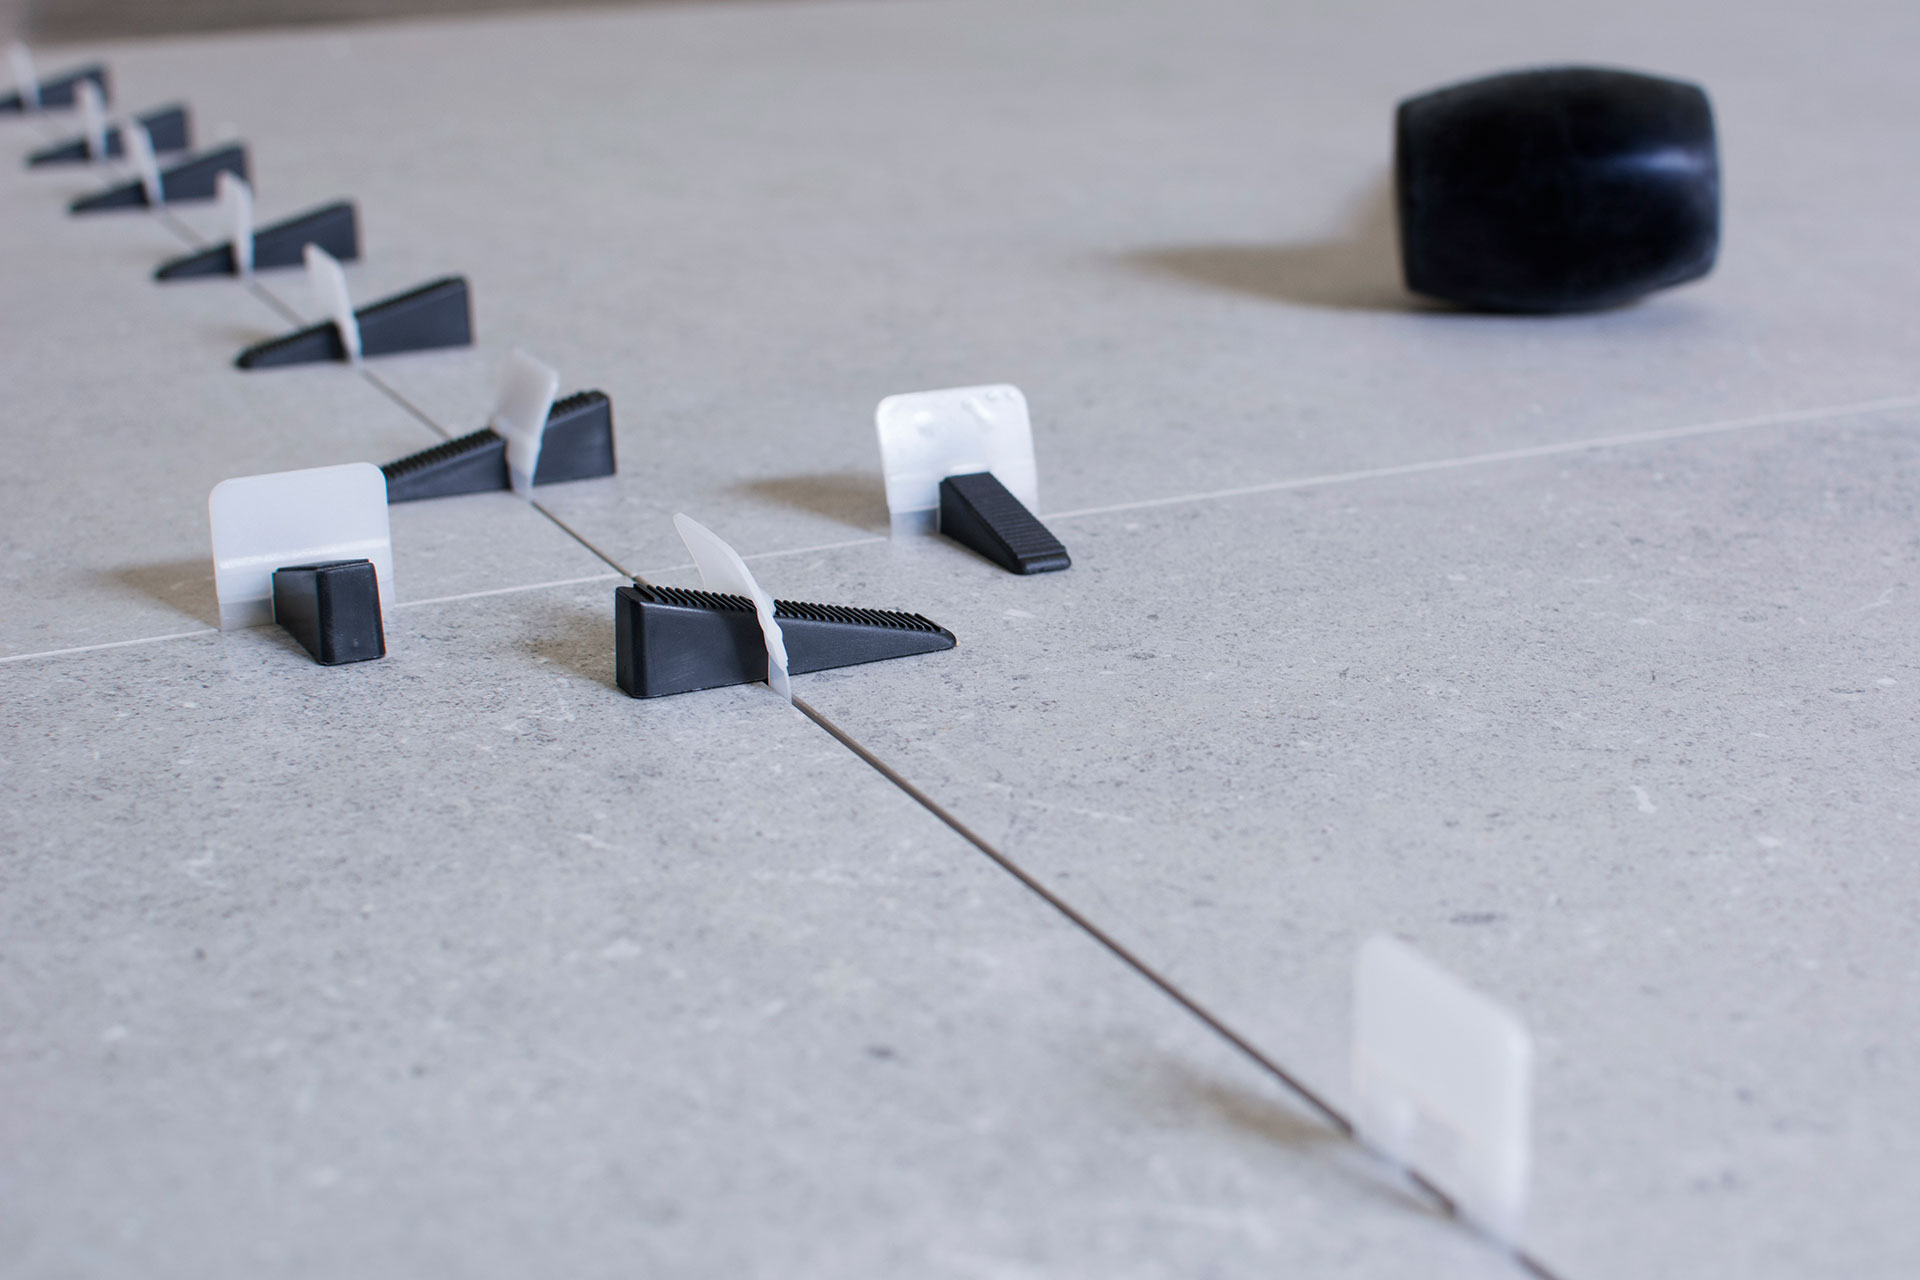
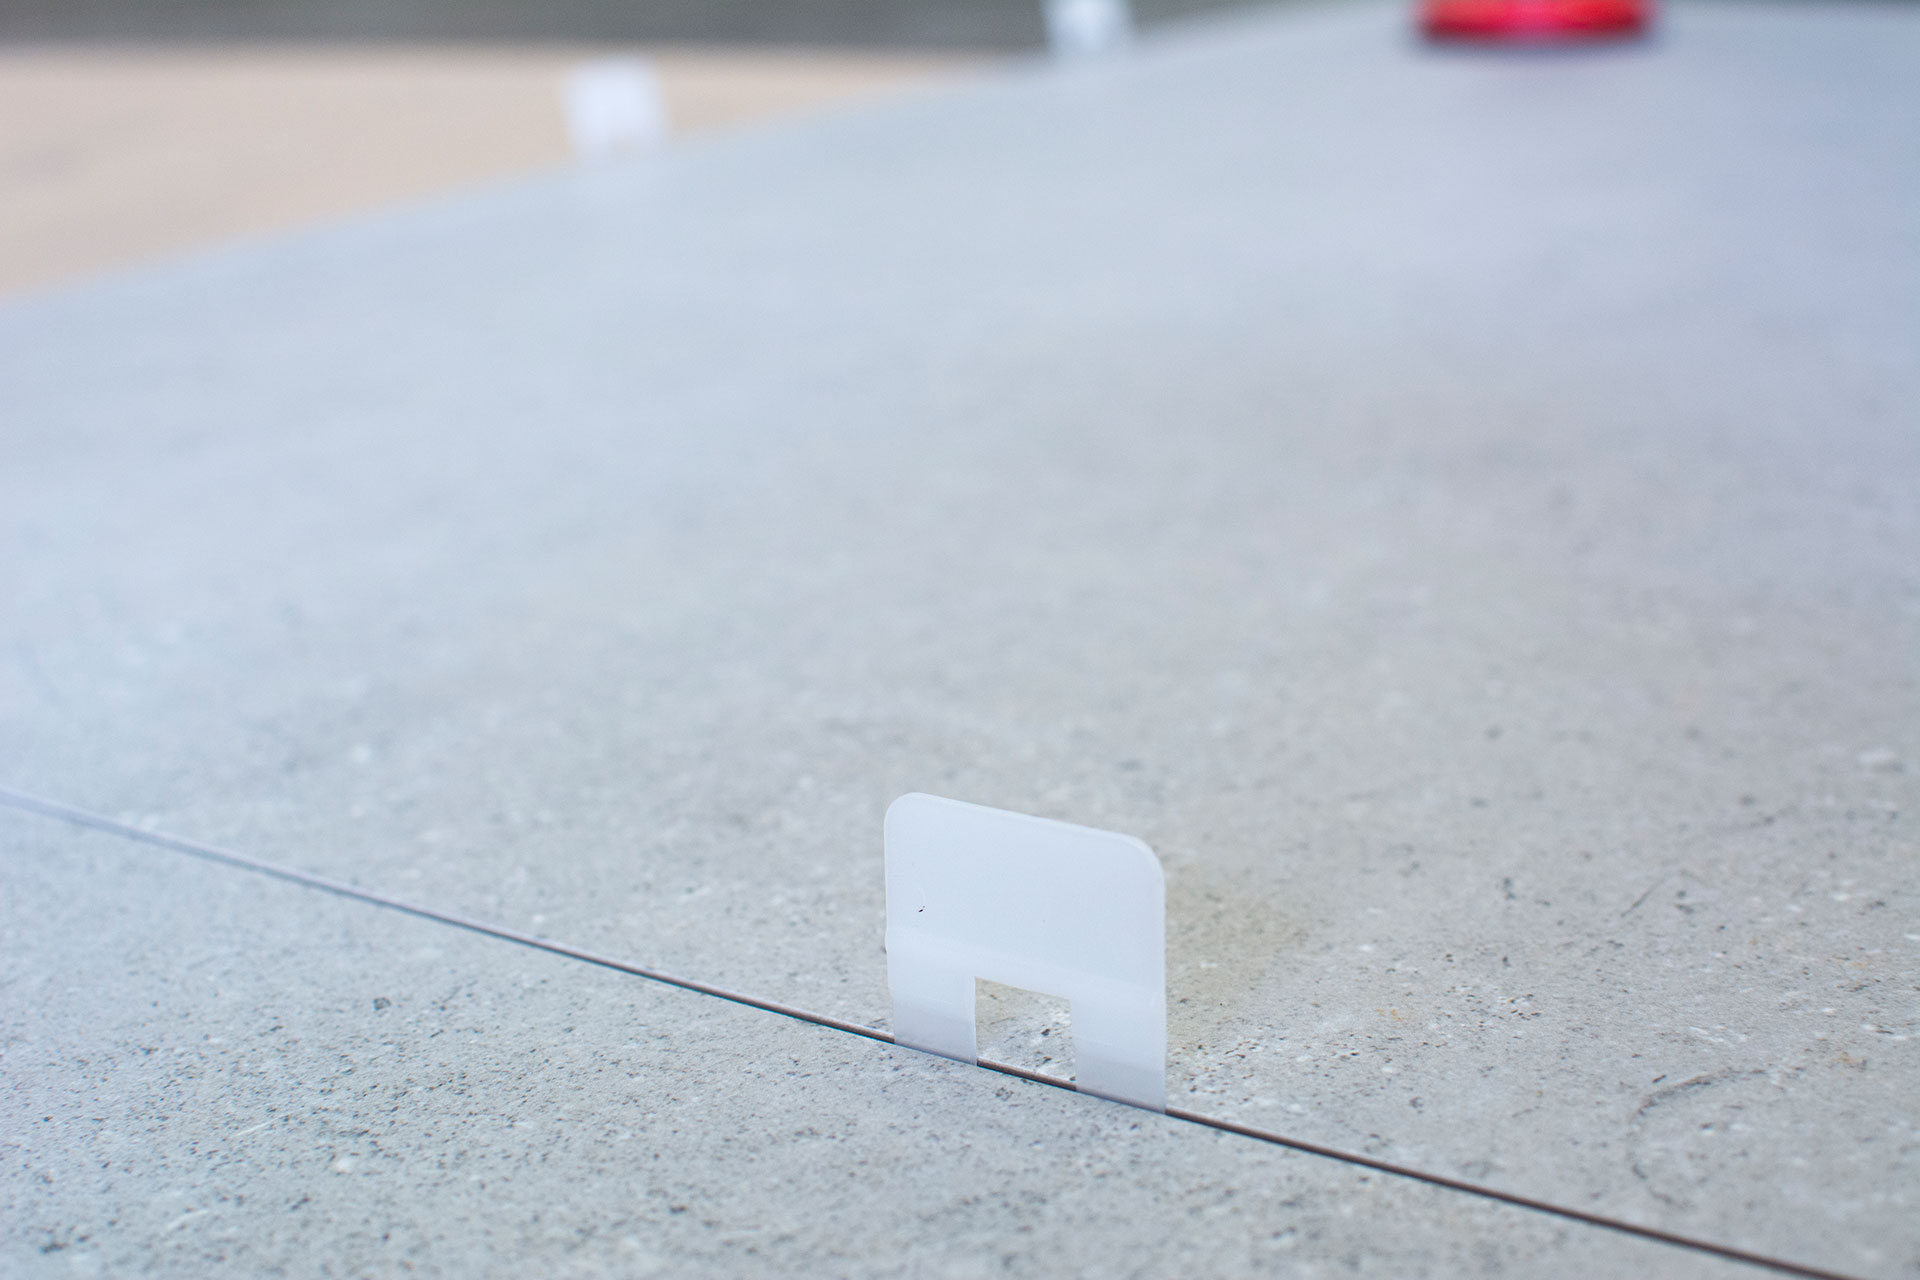
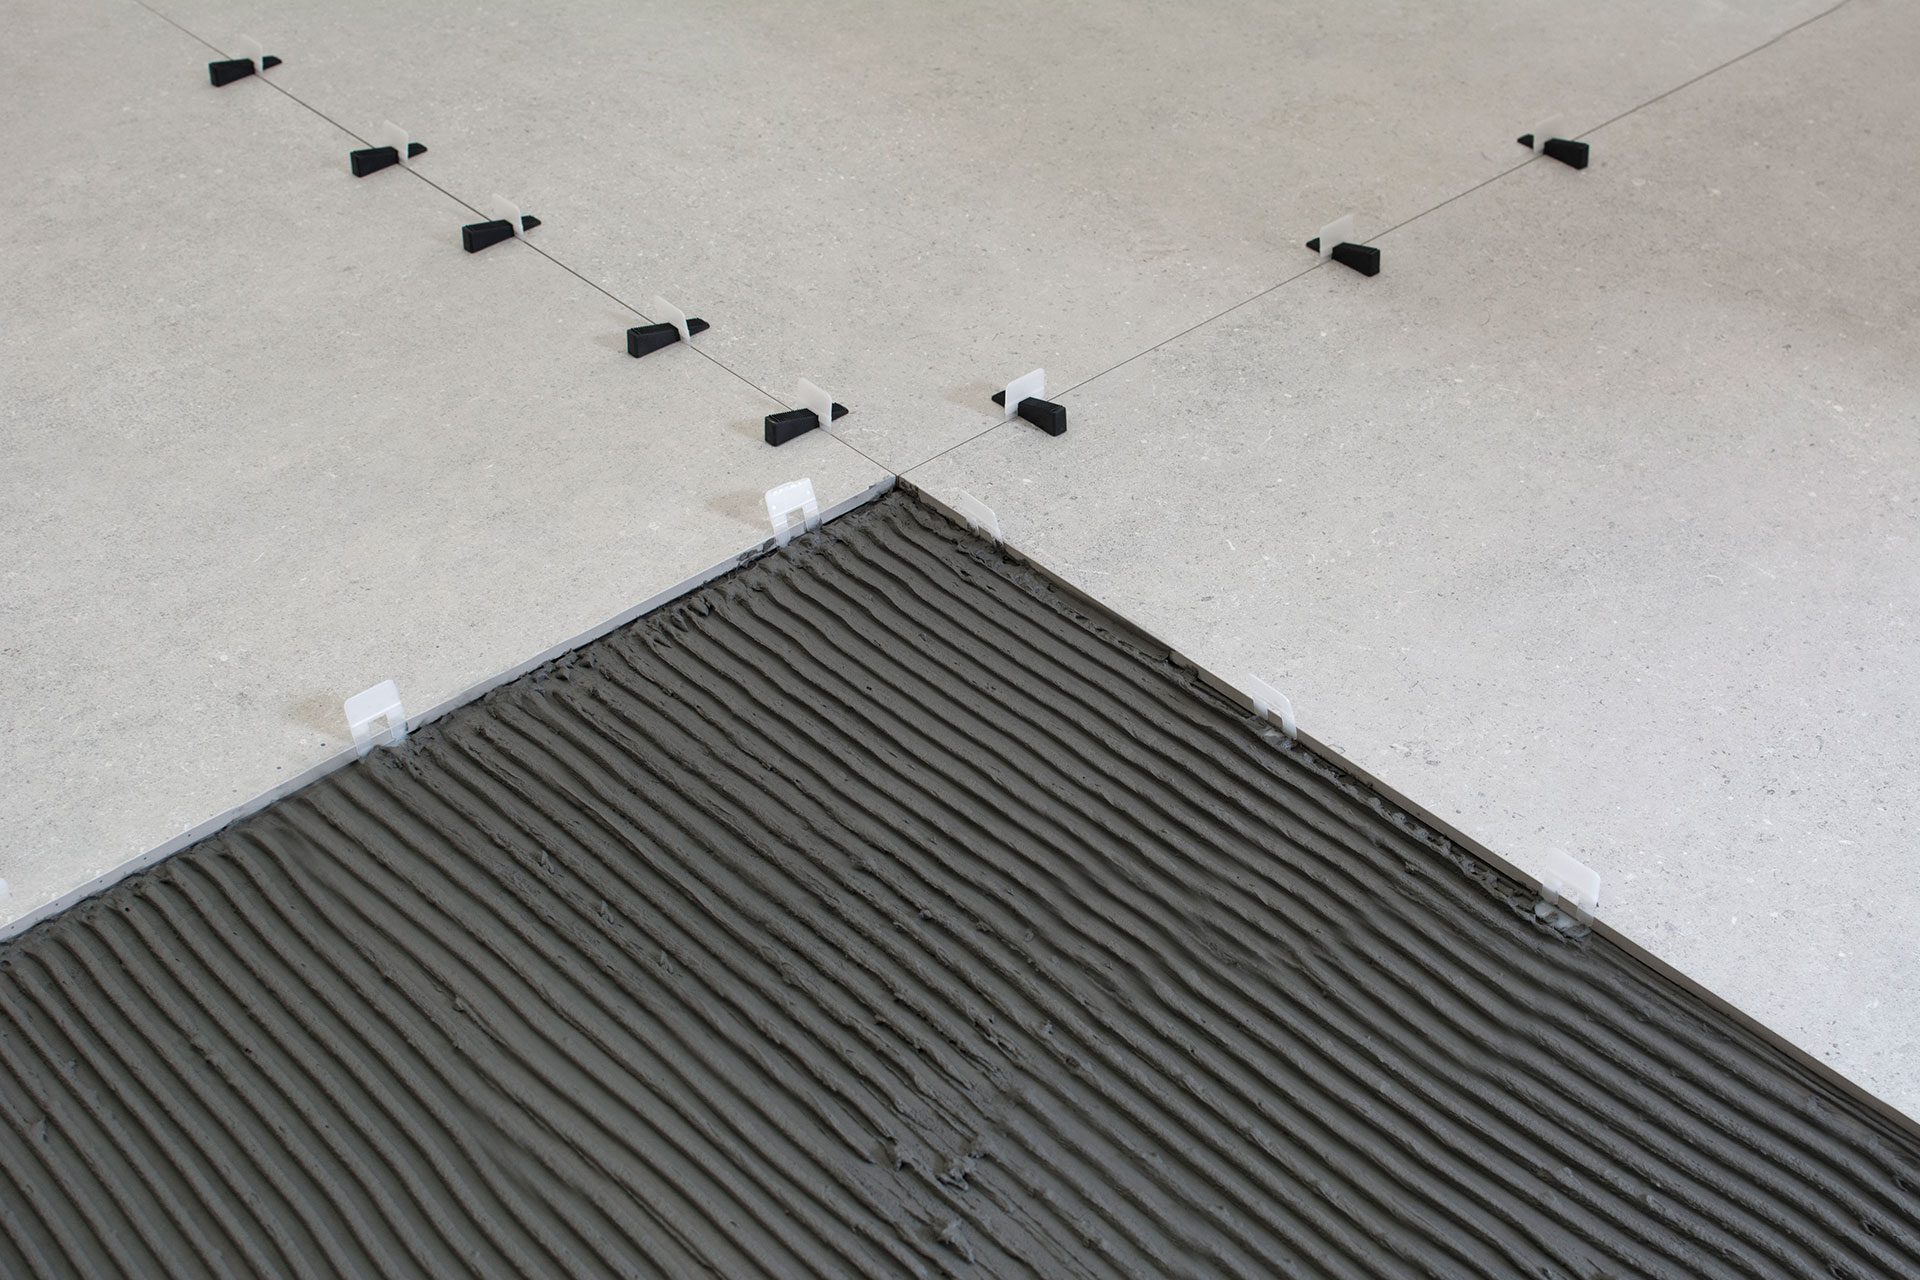
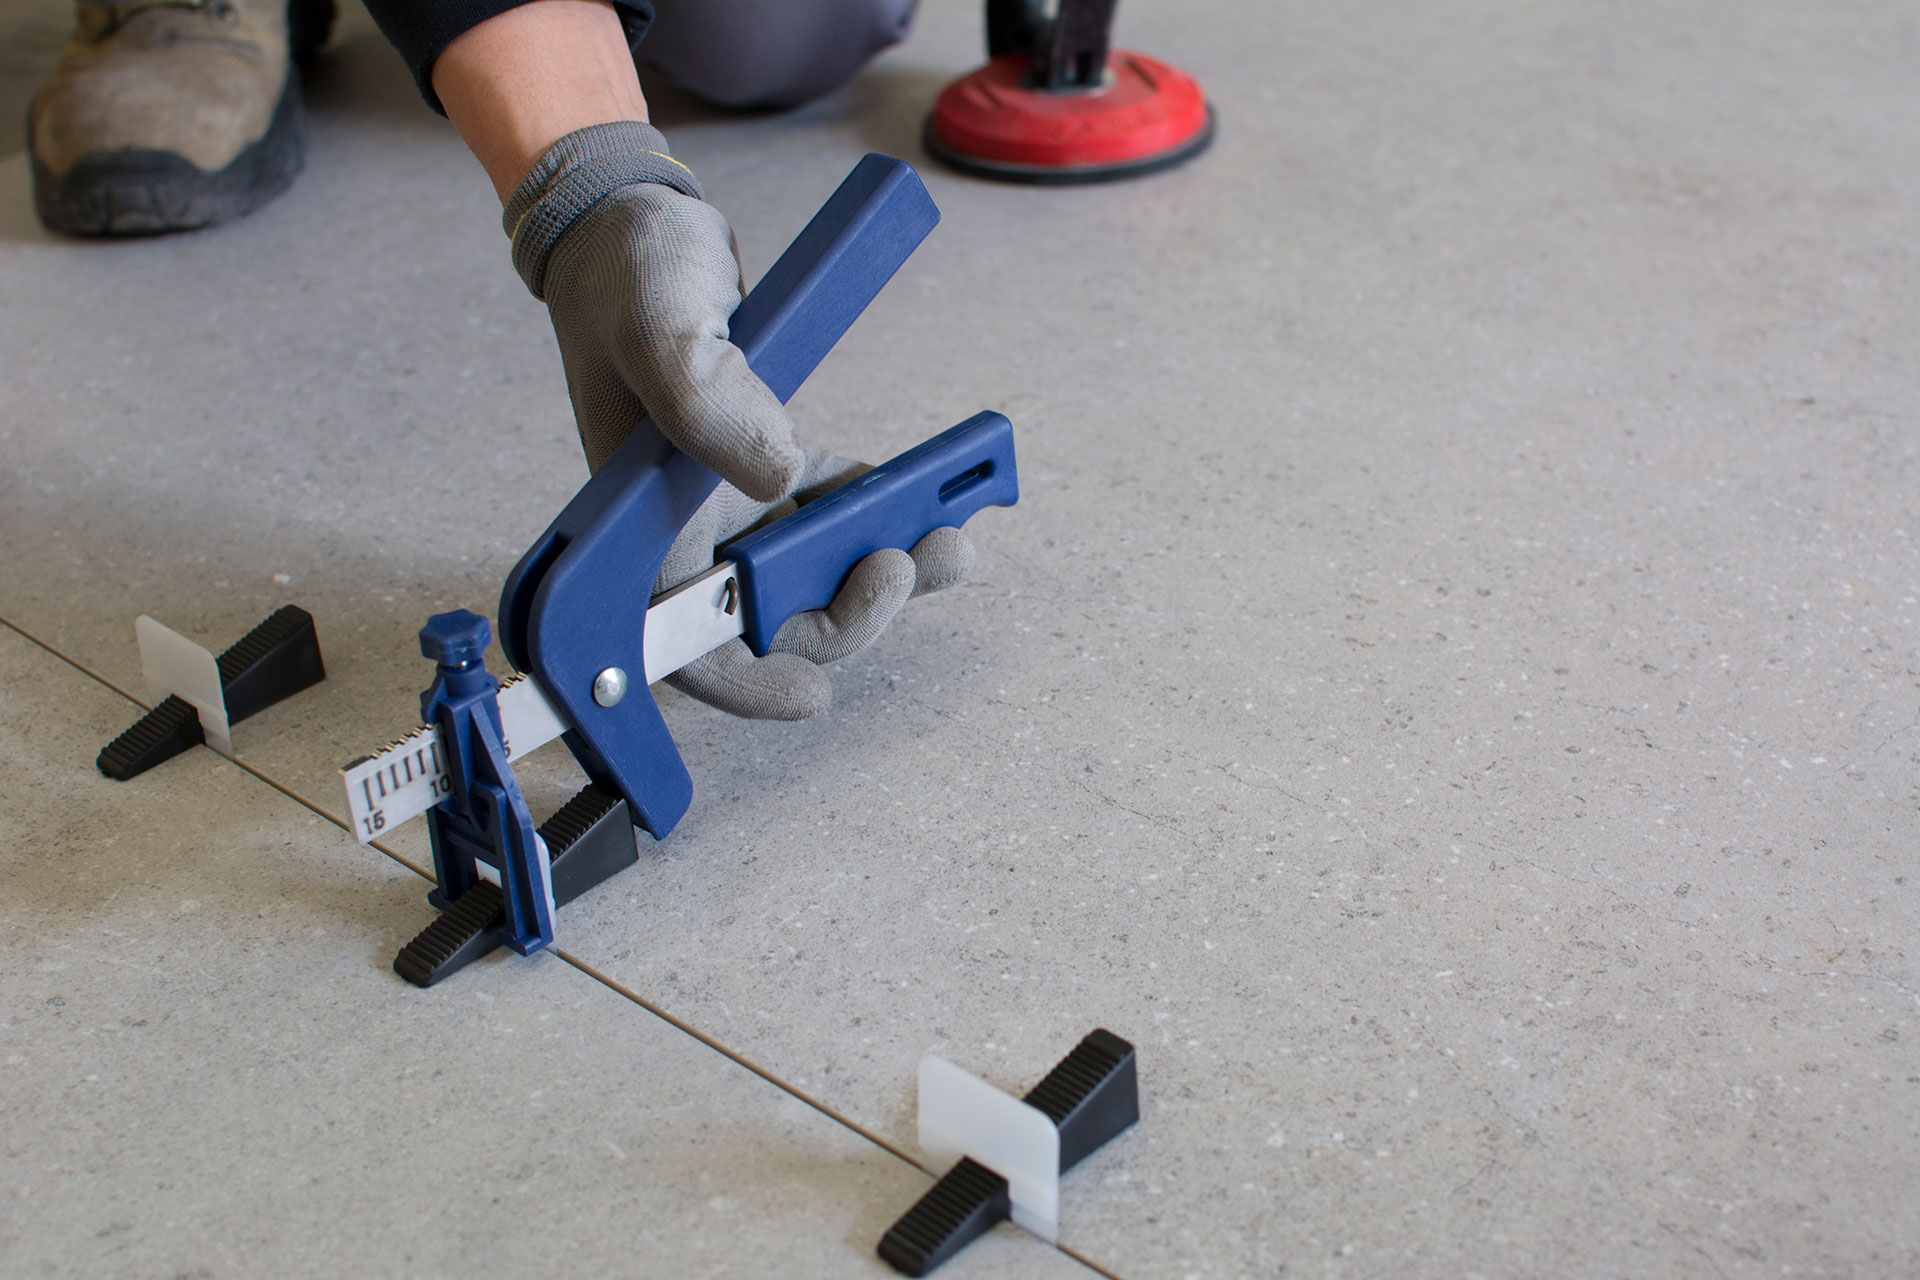
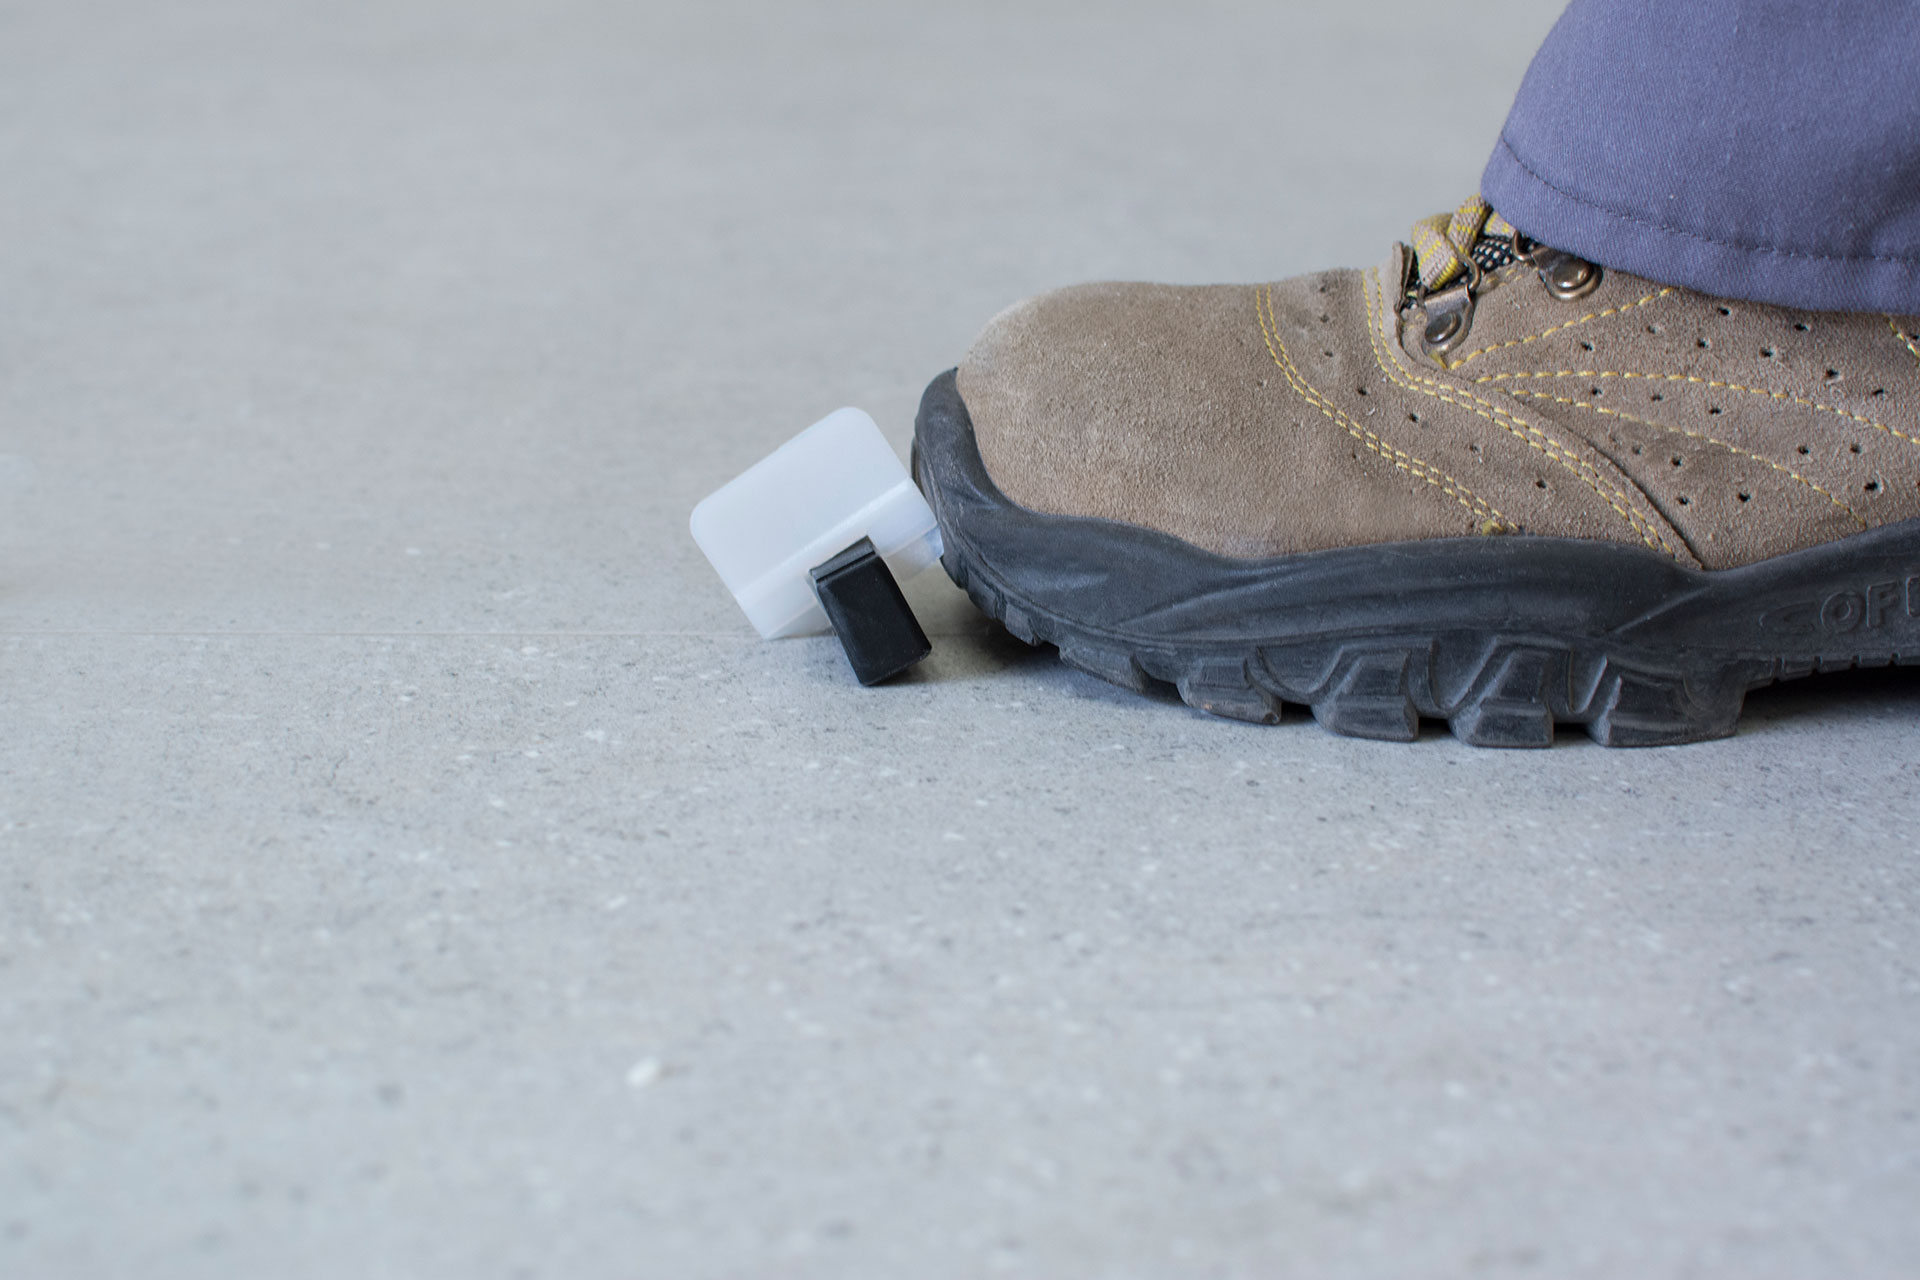
How to level the tiles Whenever we install tiles in our homes or projects, we want to avoid the fearful changes in height between the different tiles. Therefore, to achieve an optimal result in the installation we must use a leveling system. 1. We spread the adhesive on the floor or the wall, The double gluing technique will be carried out whenever the tile format requires it. 2. We place the spacers for the separation of the pieces. 3. We place the pieces called "wedge leveling system archways" 5 cm from each corner of the tile. 4. We introduce the wedges into the archways, and adjust them with the pliers. 5. Respecting the drying times, remove the wedges by tapping carefully in the direction of the joint. 6. We clean the excess material and apply grout to the pieces. Ultimately, leveling systems can be expensive, but as a result we have completely flush walls and floors with no unevenness. ← The Elegance Of Metallic Surfaces With Amazonia Monotonous, also in design →


